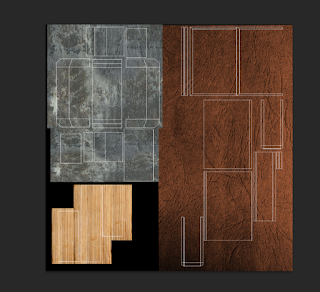
 I started off just searching for images that I could use for my spell books texture, I first thought of the texture that I would want the cover of my book to be so I found 3 old leather textures that I could use, I then found metal for the lock and rust to go on top of the metal to give the spell book an older look.
After I built my photo library for the texturing of my spell book I began to model my spell book. I started out with a fairly simple idea of how I wanted to model my spell book, so I started with a cube and made it the size I wanted my spell book to be then I used the insert edge loop tool and put 3 new edge loops in so the I could move the faces in where I wanted the pages of my book to be. so I now had my pages and my book cover but the cover had no shape to it really so I beveled the edges of the spine of my books cover and then moved the faces around until they had the angle I wanted them to have and it gave my spell book a bit of a less rigid shape.
I then created a new cube so I could model my lock for my spell book. All I did to model the lock in the shape I wanted it to be in was creating a rectangular shaped cube and then I used the edge loop tool on the top and bottom of the rectangle so I could extrude the 2 new faces I had and make a C shape but the C shape was too rigid and had sharp corners so I beveled the corners and it gave it more of a lock shape instead of a rigid shape. I then moved my lock into the right position on my spell book and adjusted the shape to make the lock fit correctly and look in proportion to the rest of the book because if it was too big or too small it wouldn't look right and it would look as though it could do the job it was intended to do on the book.
Texturing of the Book
Before i could texture the book I had to UV map it in Maya and I did this by planar mapping the model in Maya and then opening the UV texture editor and organising my UV's so that I knew what was where and it would make my life much easier when it came to actually texturing my model in photoshop. I then took a UV snapshot and saved the Snapshot in a file that i could easily remember and access so that I could find it when it cam to texturing in photoshop.
When I put my UV snapshot int photoshop I had already made a folder with all of the textures I wanted to use in it so that I wouldn't have to spend time looking for nice textures to use I had them all ready to go as soon as I needed them.
I began to apply my wanted textures to the UV spaces in photoshop so that when I put the completed texture map back into Maya i first applied the leather texture to where my Book cover was on my UV snapshot then i added the Page texture to where the pages were on the snapshot but had to make sure that they looked right in Maya and didn't look incorrect otherwise my texture wouldn't be serving its proper purpose, then I added the metal texture to the locks place and turned off the layer that had my UV snapshot on so the lines didn't appear on my models texture, i then saved my texture map and went back into Maya added a new material to my model and went into the attribute editor and added my texture that I had created. I then looked at my model and liked the texture so I saved it as my finished spell book.


No comments:
Post a Comment